In my role at Mio, I’ve had the opportunity to work fairly extensively with Microsoft Teams and the Microsoft Graph API. One thing I noticed is that their documentation is extensive, but can be overwhelming if you just need to do something simple. My goal is to write a few posts that simplifies the ways to integrate with Teams and use the Graph API.
Creating the app
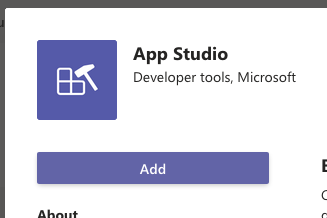
The first step we need to take is creating an app for us to use. The easiest way to do that is through the Microsoft App Studio app.
After adding that, go into the App Studio, make sure you’re in the “Manifest editor” tab, and choose “Create a new app”. After that, you’ll be greeted with a lot of options you’ll need to make your app.
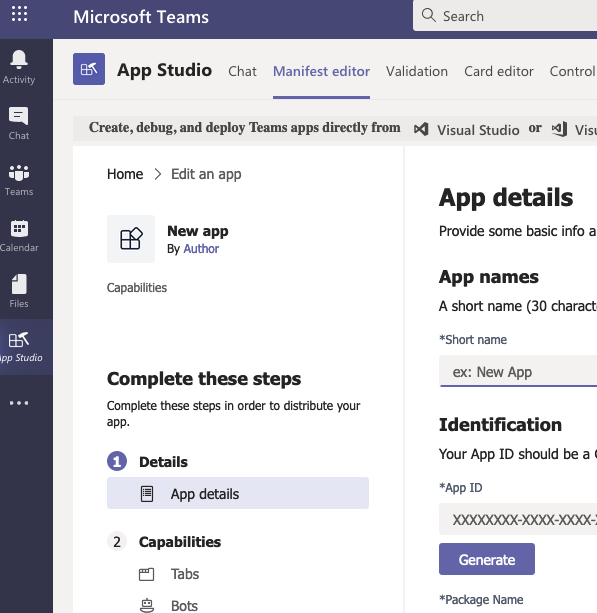
The App details are fairly self-explanatory, and you only need to worry about the ones with the star. For “App ID”, I just click the “Generate” button and it fills in a UUID for us. “Package Name” is basically like a web url, but in reverse, so mine is something like “com.terrymatula.yadayada”… “Version” should be 1.0.0 to start and should align with semantic versioning.
The various website URLs can be anything while we test. The “Branding” will need to have 2 icons, one that’s 192px by 192px, and another that’s 32×32. After that page is filled out, we should go to the Capabilities step. We can add a Tab, Bot, Connector, or Message Extension. For our purposes, we only need to worry about the Bot.
Go to the Bots step and click the Set up button. This will allows us to either connect an existing Microsoft bot we’ve already created, or create a brand new one. We’ll do a new one.
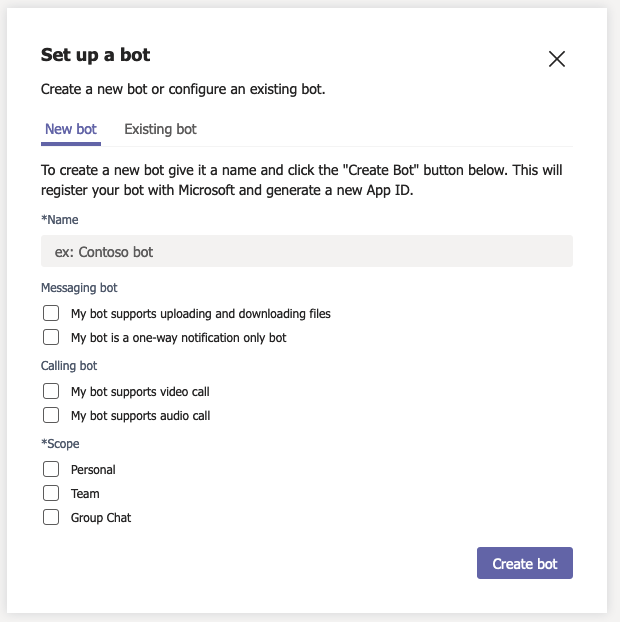
We don’t need to deal with the “Messaging bot” or “Calling bot” options at the moment. We have 3 options for “Scope”, which is basically where we want the bot to be able to work. For just one-on-one chats with the user, we choose “Personal”… for chats that include multiple users, we choose “Group Chat”… if we want to use the app in a regular Teams channel, choose “Team”. At the very least for our purposes, we’ll need to select “Team”.
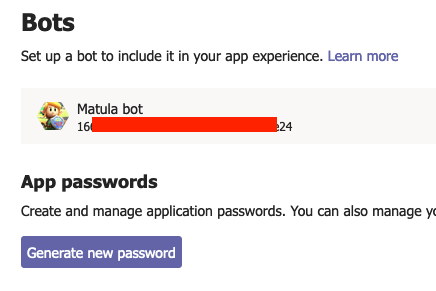
After creating the bot, the screen will show the new bot with a UUID underneath. We need to save this value as our “Client ID”. Then click “Generate new password”, and it will popup a window with a password, which we need to save (it won’t be shown again) as our “Client Secret”
That’s really all we need for now. With the Client ID and Client Secret, we can then go through the oAuth process to get a Teams user’s access token and make Graph API requests, which I’ll cover in the next post.